Showing posts with label Cooking. Show all posts

Monday, September 26, 2016

Masala Chai: Memories of India, and a Recipe


Masala Chai in the afternoon.

    We are firm believers in siesta, that marvelous time every afternoon where everyone takes a break, retreats to their rooms, and is quiet for a while. I haven't quite convinced the kids, yet, that it's a privilege and a blessing, and they often go with a bit of complaining, but this doesn't deter me. I'm a better mama for having a little quiet in the afternoon, and it follows that everyone is happier that way!  I usually make myself a cup of tea, sit down, and relax for at least part of this time. 

    Years ago I spent several months in India and Nepal where I enjoyed numerous cups of spicy tea sold by "chai wallas", street vendors squatting over steaming pots of sweet, spicy, milk tea. I remember  watching these alchemists as they squatted next to a kerosine burner, toss in handfuls of spices, creamy fresh milk, spoons overflowing with sugar, and little grains of black tea into an old worn pot. A fragrant cloud of steam would rise into the cold morning, luring me nearer. For just a few rupees, the chai walla would ladle the tea into a glass, or, in some places, a small terra cotta cup. Those were my favorite, as they were "disposable", and meant to be smashed on the ground when you were done! 

    Every week I get fresh milk from a friend who has a cow. It's become my Monday tradition to brew up a big pot of chai and keep it in a jar in my fridge. There is nothing like chai made from scratch, with fresh milk, whole spices, and robust black tea. A few people recently asked for my recipe, so I thought I'd share it here. I've adapted it to my tastes from one I found in Indian Home Cooking: A Fresh Introduction to Indian Food. Masala chai is made many ways, and this is my version. You you can easily adapt it to your tastes by changing the amount of spices, sweetener, and ratio of milk to water, or using a milk substitute. I like mine spicy, milky, and not too sweet. 

I crush whole cardamom pods, cloves, and peppercorns in a small mortar and pestle or grind them in a spice grinder. They don't need to be very fine, just broken up enough to release more of the delicious flavor! 

I break two cinnamon sticks into a couple pieces and thinly slice or roughly chop a good chunk of ginger. 


You could use any black tea, but this is what I use. It's what I remember using in India to make chai, and this is the only time I've found it in this form in the US. This happens to be a company that is local to me and I can buy it in bulk at the natural food store, but you can order it from their website or use loose black tea or tea bags. 


Mmmmm.... it smells so good!

Strain out all those delicious spices.

Add milk. It's beautiful. Sweeten to your taste, and enjoy! 

Masala Chai

Adjust the amount of spices to your taste. I use the greater amount because I like it spicy! 

18-22 Whole Green Cardamom Pods
12-15 Black Peppercorns
14-8 Whole Cloves
2 Cinnamon Sticks
2-3" Ginger Root
½ t. Ground Cinnamon (optional)

3 T Chai Patti Assam or Loose Black Tea or 5-6 Bags Black Tea


2 ½ C Water
4 C. Milk
2-3 T Honey or Sweetener of your choice

    Crush cardamom, peppercorns, and cloves in a mortar and pestle or spice grinder until they are well broken up but not too fine. Break cinnamon sticks into a couple pieces. Thinly slice or roughly chop ginger root. Add all the spices, including the ground cinnamon, if using, and the water, to a medium saucepan. Bring to a boil, then take off the heat, add tea, and cover. Let steep for 15 minutes. Strain through a fine strainer, then pour back into the pot. Add milk and sweetener to taste. Heat it back up and enjoy! I keep any extra in a jar in the fridge so I can enjoy it throughout the week. 


Wednesday, December 02, 2015

Thailand: Cooking School

When we decided to come to Thailand, one of the things I knew we wanted to do was take a cooking class. At the time, I thought I would just do it with the older kids, but Raphi and Pearl wanted to join in, and Erik thought it would be fun as well. We found a local restaurant that offers private classes and were able to all go together.  We chose four dishes to make and Nok, who runs the restaurant with her partner, Jo, walked us through the whole thing. The kids were a bit in and out, more interested at some times than others, but it worked out well. Raphi was all about pounding our spices into a nice, thick paste with the mortar and pestle! 


Mise en place. This makes cooking so much easier! (I need someone to come prep all my ingredients and clean up after me at home!)


One of our choices was panang curry, a dish we've been enjoying here in Thailand. We started with slices of fresh lemongrass and galangal root (similar to ginger), garlic, shallots, keffir lime skin, dried mild chilies and hot fresh chilies. Lots of pounding resulted in a wonderfully fragrant, thick paste. The addition of a little bit of shrimp paste added to its characteristically Thai smell!

We heated some nice, thick coconut milk to a boil, and when the oil began to separate, added in our curry paste. 

Oh, the delicious smell! Here Poppy stirs the coconut milk and curry paste into a thick mixture, adding coconut milk a little at a time.  


A little fish sauce, some salt, sugar, and chicken bouillon get added to the mix. (I'm pretty sure this is not a traditional ingredient, and wonder if it's got MSG. I will leave it out at home!) Thinly sliced chicken goes in next, stirring until it's all coated and "dry", at which point we dump in enough coconut milk to cover it. 


I add in some kaffir lime leaves, and then we cover and simmer for a while. When it's time for plating, we garnish with thinly sliced strips of more lime leaves and red pepper. Beautiful and delicious, and hey, that was easy! (Having someone do all the prep work and clean-up makes it seem like it, anyway! I know that at home it will not seem so simple, nor will it taste quite as yummy, but that won't stop me from trying!)

Meanwhile, Nok has a big pot of chicken stock simmering, and she's carefully skimming the scum as it rises. She uses it for soups and sauces, including the pad thai sauce that we're making next. I'm a big fan of bone broths, so I'm excited to see this!

The pad thai sauce starts with fresh tamarind simmering in chicken stock. The tamarind gives it a wonderful sour flavor that gets balanced out perfectly with salty and sweet notes from fish sauce, soy sauce, oyster sauce, and palm sugar. While the sauce reduces, Peregrine chops garlic to fry in a generous amount of oil along with thinly sliced chicken. 


Nok brings out a package of fresh rice noodles but includes instructions on how to properly soak the dried ones we buy at home. (And I've been doing it all wrong... maybe that's why my noodles never seem quite right!) The noodles are added in with the chicken and garlic and then you stir, stir, stir until they are soft, adding in the sauce a little at a time as it's absorbed. Nok likes to add cabbage and carrots to her pad thai along with the traditional bean sprouts and green onion. I'm a fan of veggies, so I like that. A little more oil, a few eggs, some peanuts, and chili flakes are thrown in the skillet, and the heat is turned up for one final stir. Mmmmmm..... it looks and smells wonderful!

Erik in the kitchen... now there is a sight I like! He plates the pad thai like a pro, and Nok and some other women rush in with garnishes, fanning out lettuce and bean sprouts. We also made larb gai, a delicious dish made with finely chopped chicken and lots of fresh herbs. I have attempted to make it at home before but was quite disappointed in my results. It has roasted rice, which I did, but Nok taught us to toast uncooked sticky rice along with galangal, kaffir lime leaf, and lemongrass until the rice is brown, then pound it in the mortar and pestle. It gives larb the taste I was missing when I tried it before. 

Last, but most definitely not least, Poppy and Peregrine each make a small pot of warm, sweet coconut sauce to pour over fresh mango and sticky rice. I was introduced to the amazing-ness of this dish on my first trip to Thailand in 2000 by some family friends who lived in Chiang Mai. My life has never been the same since. Seriously, it might possibly be the most delicious sweet treat ever. I'm not kidding. I don't think I've ever made it at home, but really, it's simple. (And it costs $6 or $7 at Thai restaurants in the US, so it's maybe a once a year treat!) But, like so many other things, now that we know, we can make it ourselves!

After all that cooking and sweating (did I mention it was HOT?), we are hungry! I wish I could share the smell, and more importantly, the taste with you! Under Nok's expert guidance, I think we did a pretty good job! It will certainly go down as one of our most memorable meals here, because we made it ourselves! 

I know you're not supposed to feed the wildlife, but.... feed the hungry monkeys! 

Peregrine disappeared for a minute and came back with a tray of soft drinks for everyone. We enjoyed our meal, and our cooking class with Nok, immensely! I'm so thankful for family experiences like this.  


Tuesday, November 08, 2011

Thankful: November 8


The waffle in Autumn, topped with butternut pudding, whipped cream, maple syrup and toasted pecans.
    Today I'm thankful for waffles. Shortly after Erik and I got married, we started making waffles for breakfast on Saturday mornings. We talked about how when we had kids it would be a fun tradition, a special breakfast to celebrate Daddy being home with us. The years passed, and we traded our little waffle maker for one that makes four Belgian waffles with big pockets to hold lots of yummy toppings. Our recipe has morphed over the years as well. What began as a standard recipe from my Better Homes and Gardens Cookbook eventually became gluten free. As I began to learn about the importance of whole grains and neutralizing phytic acid I experimented more until we came up with this incarnation, which we've been happy with for a couple of years now. It uses whole, uncooked brown rice that is ground up in the blender and soaked overnight. While the recipe may appear to have a lot of steps these really go together easily. (Erik even makes them himself!) 

    Beyond waffles, I'm thankful for family gathered around our table enjoying wholesome and delicious food. I'm grateful for the rhythms that make up a good life; everyone knows that on Saturday mornings mama sleeps in and daddy hangs out with the kids and makes coffee. We eat waffles, and bacon and eggs, and listen to hokey old cowboys crooning on the Country Classics show. In the summer we top them with lemon curd and fresh berries; in the fall it's some sort of pumpkin spread. We save Grandma's canned peaches for gray winter mornings when we need a little taste of summer. There's often whipped cream, and always real butter and maple syrup and jam. Yes, it's decadent, but hey, Saturdays only come once a week, right? If you're ever in the neighborhood, come and join us, won't you? We have plenty of waffles to share. 

Saturday Morning Waffles

1 3/4 C Brown Rice
2 C Buttermilk, Sour Milk, or Kefir

2 Eggs, Separated

1/2 t Baking Soda
1/4 t Salt
3 T  Melted Butter or Coconut Oil
1 t Vanilla


In order to neutralize the phytic acid do the first step the night before you want to eat these!


  1. In a blender combine whole, uncooked rice and buttermilk, sour milk or kefir. Blend on high speed until the rice is finely ground. If you find the mixture is too thick, you can add in the melted butter or oil and vanilla. Soak in blender overnight. 
  2. The next morning, separate eggs. Place the whites in a large, clean mixing bowl and put the yolks in the blender with the rice/milk mixture. If you haven't previously added the oil or butter and vanilla, do so now. Blend until combined. 
  3. Plug in your waffle maker so it will be nice and hot!
  4. Add salt to egg whites and beat until stiff. 
  5. With blender on low to medium, add the baking soda to the rice mixture. As it mixes you will see the batter start to rise. Turn off the blender. Gently pour batter into the egg whites and fold in. (I do this with the whisk attachment of my mixer.) 
  6. Follow instructions for your waffle maker. (We spray oil on ours, and set our timer for 4 1/2 minutes, but you'll need to figure out what works for you!
  7. Enjoy!


This post is part of The Nourishing Gourmet's Pennywise Platter, Food Renegade's Fight Back Friday, and Real Food Forager's Fat Tuesday

Wednesday, October 19, 2011

Maple Pumpkin Custard


    I love the turning of the seasons, and there's none I enjoy so well as Autumn. Here in the Pacific Northwest, we're blessed with a long fall. The decidous trees slowly reveal their fiery golds and reds against the backdrop of abundant evergreens. The air is decidedly cooler, and misty mornings are common, but we're still having lots of brilliant sunshine and temperatures warm enough that the kids are running around in shorts and t-shirts. Indoors, we've been lighting candles, baking, and enjoying a fire in the evening.

    As the days grow shorter, my thoughts inevitably turn toward creating things. Whether it's coming up with some new dish in the kitchen- pumpkin custard or roasted chicken and vegetable soup- or learning a new craft, I feel compelled to create. On Monday I made play dough with the kids; now that I know just how simple it is I feel silly I've never done it before. Two things I plan to do this fall are learn to knit and to make sourdough bread. I just cast on my first row of stitches, and am quite excited about trying my hand at a new art. Next week I will begin my first sourdough starter.

    I had a little puree left from a pumpkin I roasted several days ago, and rather than freezing it, Poppy and I created this simple custard that is a perfect treat for a fall day. As it bakes the pumpkin rises to the top, leaving you with a pie-like layer on top of silky maple flavored custard to make a nourishing treat. Enjoy!

Maple Pumpkin Custard
Makes 8 - 3/4 C. Servings

4 Eggs
2 Egg Yolks
1/4-1/3 C Pure Maple Syrup (depending on how sweet you like it)
2 C Milk
1/3 C Sour Cream or Whipping Cream
1/2 C Pumpkin Puree
1 t Cinnamon, plus 1/4 t each Cloves, Nutmeg, and Ginger
-or-
1 1/2 t Pumpkin Pie Spice
1 t Vanilla
1/4 t Sea Salt

Preheat oven to 375 F. Put all ingredients in a blender and puree until well combined. Place ramekins or small glass dishes into a roasting pan and then fill them with the mixture. (Alternately you could bake it in a small casserole dish.) Pour boiling water into the roasting pan until it's about an inch deep. Bake for 35-45 minutes, until a knife inserted in the center comes out clean. When cool enough to handle, remove ramekins from the water. Enjoy warm or refrigerate and eat cold. 

    I hope you are enjoying a lovely fall as well! To what does this season inspire you?


This post is part of Real Food Forager's Fat Tuesday, Food Renegade's Fight Back Friday, and The Nourishing Gourmet's Pennywise Platter

Thursday, July 21, 2011

Cherries, and Something Yummy


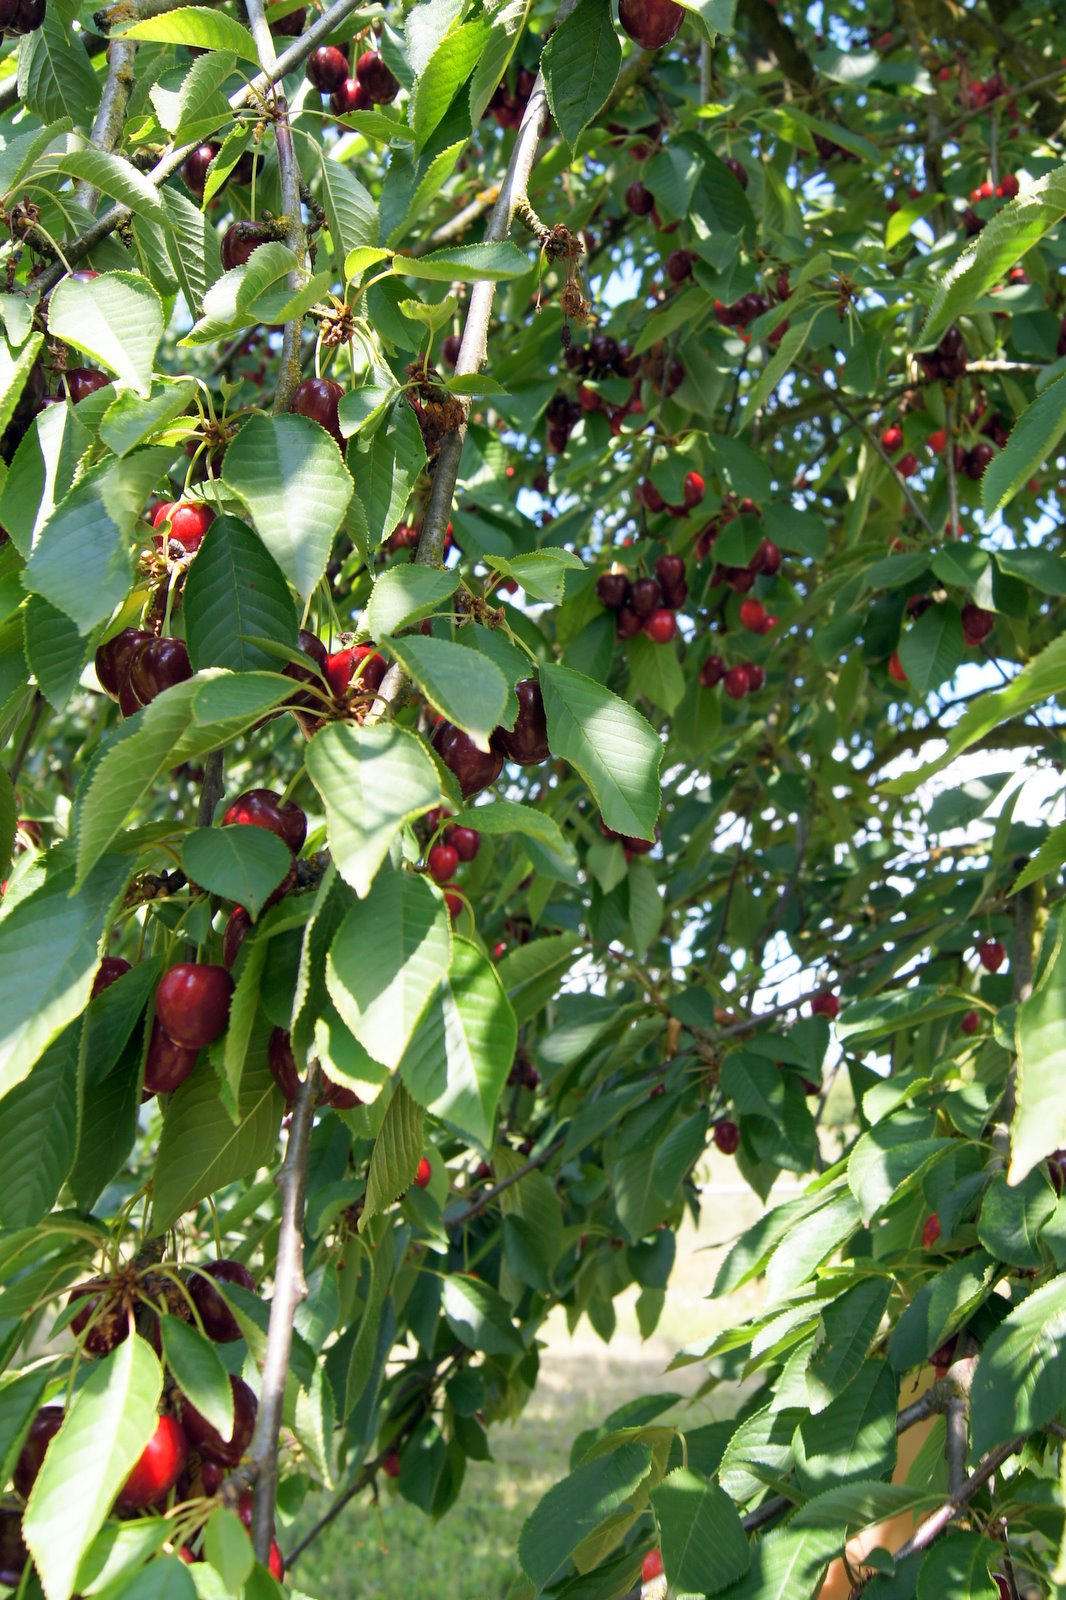
On a perfect summer's day in mid-July, my sister Gloria and I met at a local farm to pick cherries.
A lovely time was had by all!
(Cherry Honey Frozen Yogurt recipe below!)

Luscious fruit hung heavy on the branches.

Some of the best picking was to be found in Auntie Gloria's
basket. At least that's what a couple kids seemed to think! 

There were some strange characters lurking about the farm!

Poppy surprised me by picking more cherries than I did!
She said she didn't eat any because she wanted to save
hers to make Something Yummy. Talk about self-control!

"I will pick mine jerries ever in mine life!" 

Cousin Diego took his cherry eating pretty seriously.

Of course Gloria had to bring a cute basket to pick into!
No ugly plastic buckets for her. 

All picked out!

My beautiful sister. (Well, one of my beautiful sisters!)

Happy mama, happy baby.

In Poppy's words:
"Pearl is astonished by how many cherries are up there!"

Pearl, of course, had to wear the appropriate shoes for the occasion.

Something Yummy #1:
A cherry cream pie, mostly raw.
(Pecan-coconut crust, cashew cream filling, and cherry topping.)

Something Yummy #2:
 Poppy's Cherry Honey Frozen Yogurt


And here's Something Yummy for you!

 Poppy's Cherry Honey Frozen Yogurt
2 C Pitted Fresh Cherries
1/2 C Cream
2 C Yogurt or Kefir
1/4-1/3 C Honey
1 T Vanilla or Almond Extract

Blend all ingredients. You can leave some of the fruit chunky if you like, or puree until smooth. Make sure mixture is cold, and then follow instructions for your ice cream maker.

If you don't have an ice cream maker, don't despair! There are several ways 
you can make this recipe without it. Click here for ideas.
Enjoy!

This post is part of The Nourishing Gourmet's Pennywise Platter
and Food Renegade's Fight Back Friday

Thursday, June 30, 2011

"Magic Shell" Ice Cream Topping


    A friend of mine recently mentioned that her husband has been making a homemade, healthier version of Magic Shell ice cream topping. As they say on the Smucker's website, "This topping magically freezes in seconds on your ice cream to create a candy-coated topping that can be broken and mixed right in with the ice cream." The other day I found a recipe online and made a batch to share with some friends. It was a hit all around, and has no mystery ingredients. It's also super easy to make, can be made low sugar (depending on what kind of chocolate you use, and is vegan. I changed the recipe slightly, and share it here for your eating pleasure (and at the insistence of my facebook friends!)


Magic Chocolate Ice Cream Topping

1/2 C Coconut Oil*
12 oz. Chocolate Chips (about 1 1/2 C)**
1/2 t Vanilla

Melt Coconut Oil and Chocolate in a pan over low heat. Add Vanilla, and stir to combine. Cool to room temperature before drizzling over your ice cream and enjoying the magic!

Store in a jar at room temperature. If it gets too hard, microwave or warm the jar in some hot water to bring it back to a liquid state.


*If you don't like the taste of coconut, it's okay to use refined coconut oil.
**You can use whatever chocolate you like best, dark or milk. I used about 70% cocao, as I prefer a bittersweet chocolate to balance the sweetness of the ice cream. 

    I think this would also make a great alternate coating for one of our favorite frozen banana treats, PopperBanas


Thursday, June 23, 2011

Banana Fudge Popsicles


    After a long, cool spring here in the Pacific Northwest, we welcomed the first day of summer, and with it, some real live sunshine. (Did you hear us cheering?) Summer of course, means lots of yummy frozen treats. I was inspired by this Chocolate Banana Freezer Pie from The Nourishing Gourmet. I couldn't be bothered to make a crust, so adapted the filling to make enough to fit my popsicle mold. I've made these three or four times recently and everyone loves them. They're super easy, vegan, sugar free, fruit sweetened, chocolatey, creamy, and delicious.

Banana Fudge Popsicles

6 Ripe Bananas
1 C Coconut Milk (substitute Cream Cheese or Yogurt)
1/2 C Cocoa Powder
1 t Vanilla

Mix all ingredients in a blender or food processor. Pour into popsicle molds. Freeze.
Enjoy!


Here are a couple other frozen treats we enjoy:
Orange "Creamsicles"
and
PopperBanas


Pearl says "Mmmmmmm! I like these!"
What are your favorite summertime treats?
Happy Summer!

Tuesday, March 22, 2011

The Lucky Girls and a Dal Recipe


(Scroll down for the dal recipe.)

I tossed some cumin seeds into the hot oil and waited until they began to pop before adding a pile of onions, garlic, and ginger. A spoonful of turmeric turned the fragrant mixture a deep golden color as the spicy aroma wafted through the house. Soon small orange lentils would soften into a lovely yellow as the dal simmered in my biggest pot. (Recipe below)

"I don't understand why they're called Lucky!" came the bewildered comment from my eight year old son. We were preparing to screen The Lucky Girls Movie during our church's fellowship time the next day. Why, he wondered, would these girls, these motherless and forsaken orphans, be considered lucky?

My mind wandered back ten years ago, to the months I spent in India, to little street girls, running about, barefoot, unkempt, begging for their next meal. Sadly, many of them are "owned" by well organized rings who take their "earnings" in exchange for meager fare and a little shelter. I remember a lovely Indian woman with whom I stood one hot afternoon in Dehli. She held in her arms a beautiful baby girl, obviously loved. As we stood talking, a turbaned man interrupted us. They exchanged a few words; in short, he offered to buy her baby. She refused. What would have become of that baby? What becomes of so many unwanted girls in India?

The plight of the girl child in India can be devastating. Girls will grow up, and, in order to marry, will need a dowry, something many impoverished families simply cannot afford. And so the girl becomes a burden to her family. In many circumstances, she is aborted, and never even given a chance at life. Many more young girls grow up in brothels, or in other forms of slavery, with no hope of an education, of freedom, of marriage, or of any independence.

My son, in his warm and safe home, surrounded by loving family, cannot fathom these things. But these girls, these Lucky ones, know what their fate could be. Having lost mothers, fathers, left alone or perhaps having become a burden to a relative, they've found a place where they're loved and cared for. They have found a home. In Sister Nectaria they have one who loves them like a mother. They're given the gift of an education, which will open up many opportunities for them. They are given safety and security, a hope and a future.

Sunday morning came. I dressed in my shalwar kameez, long pushed to the back of my closet. I wanted to share with my church family a little of my love for India, for her people, and specifically for her girls. Together with some friends we provided a simple meal of rice, dal, cabbage, and fruit. Our usually loud fellowship room became quiet as we listened to the stories of these young women. Afterwards many people thanked us for sharing The Lucky Girls with them, for allowing them to see this place, to hear these voices from the other side of the world.

I'm so thankful to have had the opportunity to introduce others to this wonderful ministry in India. There are so many needs in this world, but this is certainly a worthy place to direct out attention, our prayers, and if we're able, our resources. There are many ways that you can be involved. Will you pray for the Lucky Girls, and consider how you can be a part of this project too?

You can watch the full, 15 minute film, here.

Masoor Dal


Oil or Butter
1 t Cumin Seeds
2 T Chopped Garlic 

2 T Chopped Ginger
1 Chopped Onion
1t Turmeric
1/2 t Cayenne Peper
1 Tomato, diced, or 1 can Diced Tomatoes

1 C Red Lentils (Masoor Dal)
(I soak mine overnight with a little lemon juice, but this is optional)
6 C Water or Broth

2 t Salt

Heat the oil or butter and fry the cumin seeds until they begin to sizzle and pop. Add the onion, garlic, and ginger and cook until slightly softened. Add the spices and cook for another minute or two. Add water, lentils, and tomatoes. Bring to a boil, then simmer, uncovered, until lentils are cooked and turning mushy. Stir occasionally. You may need to add a little more water if it's getting too thick. 

Adapted from The Curry Book

This post is part of The Nourishing Gourmet's Pennywise Platter
and Food Renegade's Fight Back Friday.

Tuesday, March 15, 2011

PopperBanas


When we were in Mexico last month, I enjoyed the simplicity of preparing food for my family using only a few ingredients. I'm always a very "real foods" sort of cook, but without the luxury of my well stocked pantry, I was forced to take things a step simpler. That, and the fact that my kids don't eat refined sugar (for the most part), led to the creation of these frozen banana pops one hot afternoon. Raphael helped me make them, and referred to them as "Popper Banas". (I love this stage, where they talk pretty well, but still have those funny little ways of saying things!) So, Popper Banas were a hit in our family, and as I'm making them again today, I thought I'd share them with you. Enjoy!


Popper Banas
These are gluten, grain, and refined sugar free.
 They are vegan and also suitable for people on GAPS or SCD diet.


Ingredients:
Ripe Bananas
Popsicle Sticks
1/2 C Coconut Oil
1/2 C Peanut Butter
2-3 T Honey
1/2 t Vanilla 
A Pinch of Salt


Optional:
 3 T Cocoa plus 2 additional T. coconut oil
Coconut Flakes or Chopped Peanuts


Peel bananas and insert a popsicle stick a couple inches into one end. If the banana cracks a little, don't worry; it's going to freeze and won't be a problem. Lay the bananas on a tray lined with parchment or waxed paper, or a nonstick baking sheet. If you want to make your bananas go further, you can cut them in half and have shorter pops. Put this tray in the freezer for at least 30 minutes, until the bananas are very cold, if not frozen through.


When your bananas are very cold (or frozen), melt coconut oil in a small saucepan. Turn off heat and mix in peanut butter, honey, vanilla, and salt. If you want to make chocolate pops, then go ahead and stir in the cocoa powder.  It should be a fairly thin consistency. Once it's all mixed together, pour it into a tall glass. 


Get your frozen bananas, and carefully dip each one into the peanut butter mixture. Hold it over the glass for a minute to drip off. The cold from the banana will harden the coating. Put the tray back in the freezer fora couple minutes, and then do one more coat. 


If you want to add coconut or peanuts to the outside, you'll need to have a shallow dish ready with your "sprinkles". The coating will harden pretty quickly, so after the second coat, quickly roll the whole thing into the coconut or chopped peanuts.


Freeze until solid, about an hour if they weren't  thoroughly frozen already. If they were, they should be ready to eat within a few minutes.
Enjoy!


If you have a little peanut butter mixture left over, you can mix in the leftover coconut flakes and/or peanuts, scoop it onto a cookie sheet, and refrigerate until hardened. Voila... Coconut Haystacks!

This recipe is part of the Pennywise Platter carnival at the Nourishing Gourmet
and Fight Back Friday at Food Renegade.

Wednesday, January 05, 2011

Coconut Haystacks


    I've brought these to a couple potlucks over the last several months and have been asked if I'd share the recipe. My mom used to make chocolate oatmeal no-bake cookies for us when I was a kid, but since my kids can't eat sugar or oats I came up with this version for them. It's gluten free, grain free, refined sugar free, dairy free, no bake, vegan, a one pot wonder, and best of all, just plain yummy. (Even people who can have all those things love these!) They have just a handful of ingredients and come together in as many minutes, which makes them perfect for this busy season of life. Enjoy!

Coconut Haystacks

1/2 C. Peanut Butter
1/2 C. Coconut Oil
1/4 C. Honey
1 t. Vanilla
Sea Salt

2 1/2 C Unsweetened, Shredded Coconut


Chocolate Variation:
Increase honey to 1/3 C. and add 1/2 C. Cocoa powder


Melt the coconut oil in a medium saucepan over low heat. Add the peanut butter, honey, vanilla, and sea salt and stir until well combined. (Resist the temptation to eat this by the spoonful.) Remove from heat and add the shredded coconut; combine. Using a cookie scoop or tablespoon, drop onto a baking sheet that's been greased or is lined with parchment paper. Refrigerate until firm, then remove from the pan and store in an airtight container in the fridge. 


This post is part of The Nourishing Gourmet's Pennywise Platter  Food Renegade's Fight Back Friday, and Real Food Forager's Grain Free Round-up.


Sunday, August 22, 2010

Grain Free Scones

    A few years ago we had a lovely Sunday evening tradition of having "tea" for dinner. It usually consisted of scones, tea, and a few other small things, maybe some slices of cheese or hard boiled eggs. It was simple, and a nice way to end the weekend together. We got away from it in the last several months, as Erik, Peregrine, and Poppy have been off of all grains.
    I love to bake, and had been pretty proficient at doing gluten free, but grain free has been a new challenge! Thankfully, there's a lot you can do with both almond and coconut flour. When I posted on Facebook last week that we were having grain free scones someone asked me for the recipe so I thought I'd share it here. This is adapted from a recipe in Elana Amsterdam's wonderful book, The Gluten-Free Almond Flour Cookbook. I highly recommend both her book and her website, elanaspantry.com. With no further ado, here's the recipe I've been using.


Currant and Lemon Zest Scones
(Cute little boy not included)

Sunday Evening Scones

2 1/2 C Blanched Almond Flour
1/2 t. Sea Salt
1/2 t. Baking Soda
1/2 t Cinnamon, Nutmeg, or Cardamom (optional)
1/3 C Melted Coconut Oil
1/4 C Honey
2 Eggs
1 T Grated Citrus Peel (optional)
 1 C Currants, Nuts, Dried Fruit, or Chocolate Chips

Preheat oven to 350 and line a large baking sheet or two small sheets with parchment paper. 
In a large mixing bowl combine the almond flour, salt, baking soda, and spice if using. 
In a separate bowl combine melted coconut oil, honey, eggs, and citrus zest; whisk to combine. Add wet ingredients and whatever nuts and/or dried fruit you're using to the almond flour mixture. Mix just until it forms a stiff dough. Drop the batter, in scant 1/4 cups, onto the parchment lined baking sheets. 
Bake for 12-17 minutes until golden and firm to the touch. You can do the toothpick test if you're not sure if they're done or not. Serve warm or cool. 
Enjoy!


This post is linked to Real Food Forager's Grain Free Round-Up.