Showing posts with label Recipes. Show all posts

Monday, September 26, 2016

Masala Chai: Memories of India, and a Recipe


Masala Chai in the afternoon.

    We are firm believers in siesta, that marvelous time every afternoon where everyone takes a break, retreats to their rooms, and is quiet for a while. I haven't quite convinced the kids, yet, that it's a privilege and a blessing, and they often go with a bit of complaining, but this doesn't deter me. I'm a better mama for having a little quiet in the afternoon, and it follows that everyone is happier that way!  I usually make myself a cup of tea, sit down, and relax for at least part of this time. 

    Years ago I spent several months in India and Nepal where I enjoyed numerous cups of spicy tea sold by "chai wallas", street vendors squatting over steaming pots of sweet, spicy, milk tea. I remember  watching these alchemists as they squatted next to a kerosine burner, toss in handfuls of spices, creamy fresh milk, spoons overflowing with sugar, and little grains of black tea into an old worn pot. A fragrant cloud of steam would rise into the cold morning, luring me nearer. For just a few rupees, the chai walla would ladle the tea into a glass, or, in some places, a small terra cotta cup. Those were my favorite, as they were "disposable", and meant to be smashed on the ground when you were done! 

    Every week I get fresh milk from a friend who has a cow. It's become my Monday tradition to brew up a big pot of chai and keep it in a jar in my fridge. There is nothing like chai made from scratch, with fresh milk, whole spices, and robust black tea. A few people recently asked for my recipe, so I thought I'd share it here. I've adapted it to my tastes from one I found in Indian Home Cooking: A Fresh Introduction to Indian Food. Masala chai is made many ways, and this is my version. You you can easily adapt it to your tastes by changing the amount of spices, sweetener, and ratio of milk to water, or using a milk substitute. I like mine spicy, milky, and not too sweet. 

I crush whole cardamom pods, cloves, and peppercorns in a small mortar and pestle or grind them in a spice grinder. They don't need to be very fine, just broken up enough to release more of the delicious flavor! 

I break two cinnamon sticks into a couple pieces and thinly slice or roughly chop a good chunk of ginger. 


You could use any black tea, but this is what I use. It's what I remember using in India to make chai, and this is the only time I've found it in this form in the US. This happens to be a company that is local to me and I can buy it in bulk at the natural food store, but you can order it from their website or use loose black tea or tea bags. 


Mmmmm.... it smells so good!

Strain out all those delicious spices.

Add milk. It's beautiful. Sweeten to your taste, and enjoy! 

Masala Chai

Adjust the amount of spices to your taste. I use the greater amount because I like it spicy! 

18-22 Whole Green Cardamom Pods
12-15 Black Peppercorns
14-8 Whole Cloves
2 Cinnamon Sticks
2-3" Ginger Root
½ t. Ground Cinnamon (optional)

3 T Chai Patti Assam or Loose Black Tea or 5-6 Bags Black Tea


2 ½ C Water
4 C. Milk
2-3 T Honey or Sweetener of your choice

    Crush cardamom, peppercorns, and cloves in a mortar and pestle or spice grinder until they are well broken up but not too fine. Break cinnamon sticks into a couple pieces. Thinly slice or roughly chop ginger root. Add all the spices, including the ground cinnamon, if using, and the water, to a medium saucepan. Bring to a boil, then take off the heat, add tea, and cover. Let steep for 15 minutes. Strain through a fine strainer, then pour back into the pot. Add milk and sweetener to taste. Heat it back up and enjoy! I keep any extra in a jar in the fridge so I can enjoy it throughout the week. 


Wednesday, December 14, 2011

Saint Herman of Alaska and Spiced Snickerdoodles


Father Herman with Northern Lights behind him.
Painting by Poppy and I, with a little clip-art monk.
    
    December 13th is one of the days that Orthodox Christians remember Saint Herman of Alaska, a Russian monk who lived among the Aleut people two hundred years ago. He settled on Spruce Island and cared deeply for the villagers there, sharing with them God's love and his very life. He taught them to boil salt out of the ocean water and preserve food for winter, and he defended them against corrupt traders who sought to exploit and abuse them and their land. He was greatly loved and respected by those who knew him. The Aleuts called him Apa, or Grandfather, and he did all he could to help, care for, and protect those in need.


Peregrine chose for us to paint the story of when a tsunami was coming and Father Herman placed an icon in the sand, praying to God to save the village. In faith he said the waves would come no further than where the icon stood, and they didn't.
Both paintings were inspired by the book North Star: Saint Herman of Alaska.

Our Playmobil advent calendar was transformed into a scene on Spruce Island today, complete with Father Herman, who was a borrowed shepherd from our nativity set, and a little paper church. It is said that the animals all loved Saint Herman and even bears would eat out of his hand!

Father Herman loved children, and would bake lots of biscuits and cookies to share with them. In his honor we made some cookies and all enjoyed them very much.


    These cookies are inspired by Glutenfreefix's Snickerdoodles recipe. I made several changes, and these are gluten free and also vegan. They are delicious, and still very healthy.  I'm really happy with the texture, which is just a little chewy in the middle but has a nice crunch on the outside. I added more spices than a typical snickerdoodle, and so these are more of a cross between a spice cookie and snicker- doodles. Enjoy! 

Saint Herman Day Cookies
Gluten Free and Vegan
1 C Coconut Oil, room temperature
1/2 C Honey
1/4 C Coconut Sugar or other granulated sugar
1 t. Vanilla


1 1/2 C Almond Flour
2/3 C Coconut Flour
1/2 C Gluten Free Flour of your choice (I use a blend)
1 t Baking Soda
1/2 t Sea Salt
1/2 t each Cinnamon, Cloves, Ginger


Cinnamon-Sugar blend for rolling


 Mix Coconut Oil, Honey, Sugar, and Vanilla in a mixer until fluffy. Add dry ingredients and mix until combined. If the dough is too soft to roll into balls let it rest in the refrigerator for a half hour or so. Form into 1-inch balls and roll in Cinnamon Sugar to coat. Place on a greased or lined baking sheet. Press each ball gently to flatten just a bit. Bake at 325° for 8-10 minutes. You'll know they're done when they've flattened, puffed, and just started to look a bit "cracked" on top. Take them out when they still feel pretty soft if you prefer a more chewy cookie. Cool for a few minutes on the pan before placing on a rack. 
Makes approximately 3 dozen cookies. 
Enjoy!

This post is part of The Nourishing Gourmet's Pennywise Platter and Food Renegade's Fight Back Friday. 

Tuesday, November 08, 2011

Thankful: November 8


The waffle in Autumn, topped with butternut pudding, whipped cream, maple syrup and toasted pecans.
    Today I'm thankful for waffles. Shortly after Erik and I got married, we started making waffles for breakfast on Saturday mornings. We talked about how when we had kids it would be a fun tradition, a special breakfast to celebrate Daddy being home with us. The years passed, and we traded our little waffle maker for one that makes four Belgian waffles with big pockets to hold lots of yummy toppings. Our recipe has morphed over the years as well. What began as a standard recipe from my Better Homes and Gardens Cookbook eventually became gluten free. As I began to learn about the importance of whole grains and neutralizing phytic acid I experimented more until we came up with this incarnation, which we've been happy with for a couple of years now. It uses whole, uncooked brown rice that is ground up in the blender and soaked overnight. While the recipe may appear to have a lot of steps these really go together easily. (Erik even makes them himself!) 

    Beyond waffles, I'm thankful for family gathered around our table enjoying wholesome and delicious food. I'm grateful for the rhythms that make up a good life; everyone knows that on Saturday mornings mama sleeps in and daddy hangs out with the kids and makes coffee. We eat waffles, and bacon and eggs, and listen to hokey old cowboys crooning on the Country Classics show. In the summer we top them with lemon curd and fresh berries; in the fall it's some sort of pumpkin spread. We save Grandma's canned peaches for gray winter mornings when we need a little taste of summer. There's often whipped cream, and always real butter and maple syrup and jam. Yes, it's decadent, but hey, Saturdays only come once a week, right? If you're ever in the neighborhood, come and join us, won't you? We have plenty of waffles to share. 

Saturday Morning Waffles

1 3/4 C Brown Rice
2 C Buttermilk, Sour Milk, or Kefir

2 Eggs, Separated

1/2 t Baking Soda
1/4 t Salt
3 T  Melted Butter or Coconut Oil
1 t Vanilla


In order to neutralize the phytic acid do the first step the night before you want to eat these!


  1. In a blender combine whole, uncooked rice and buttermilk, sour milk or kefir. Blend on high speed until the rice is finely ground. If you find the mixture is too thick, you can add in the melted butter or oil and vanilla. Soak in blender overnight. 
  2. The next morning, separate eggs. Place the whites in a large, clean mixing bowl and put the yolks in the blender with the rice/milk mixture. If you haven't previously added the oil or butter and vanilla, do so now. Blend until combined. 
  3. Plug in your waffle maker so it will be nice and hot!
  4. Add salt to egg whites and beat until stiff. 
  5. With blender on low to medium, add the baking soda to the rice mixture. As it mixes you will see the batter start to rise. Turn off the blender. Gently pour batter into the egg whites and fold in. (I do this with the whisk attachment of my mixer.) 
  6. Follow instructions for your waffle maker. (We spray oil on ours, and set our timer for 4 1/2 minutes, but you'll need to figure out what works for you!
  7. Enjoy!


This post is part of The Nourishing Gourmet's Pennywise Platter, Food Renegade's Fight Back Friday, and Real Food Forager's Fat Tuesday. 

Wednesday, October 19, 2011

Maple Pumpkin Custard


    I love the turning of the seasons, and there's none I enjoy so well as Autumn. Here in the Pacific Northwest, we're blessed with a long fall. The decidous trees slowly reveal their fiery golds and reds against the backdrop of abundant evergreens. The air is decidedly cooler, and misty mornings are common, but we're still having lots of brilliant sunshine and temperatures warm enough that the kids are running around in shorts and t-shirts. Indoors, we've been lighting candles, baking, and enjoying a fire in the evening.

    As the days grow shorter, my thoughts inevitably turn toward creating things. Whether it's coming up with some new dish in the kitchen- pumpkin custard or roasted chicken and vegetable soup- or learning a new craft, I feel compelled to create. On Monday I made play dough with the kids; now that I know just how simple it is I feel silly I've never done it before. Two things I plan to do this fall are learn to knit and to make sourdough bread. I just cast on my first row of stitches, and am quite excited about trying my hand at a new art. Next week I will begin my first sourdough starter.

    I had a little puree left from a pumpkin I roasted several days ago, and rather than freezing it, Poppy and I created this simple custard that is a perfect treat for a fall day. As it bakes the pumpkin rises to the top, leaving you with a pie-like layer on top of silky maple flavored custard to make a nourishing treat. Enjoy!

Maple Pumpkin Custard
Makes 8 - 3/4 C. Servings

4 Eggs
2 Egg Yolks
1/4-1/3 C Pure Maple Syrup (depending on how sweet you like it)
2 C Milk
1/3 C Sour Cream or Whipping Cream
1/2 C Pumpkin Puree
1 t Cinnamon, plus 1/4 t each Cloves, Nutmeg, and Ginger
-or-
1 1/2 t Pumpkin Pie Spice
1 t Vanilla
1/4 t Sea Salt

Preheat oven to 375 F. Put all ingredients in a blender and puree until well combined. Place ramekins or small glass dishes into a roasting pan and then fill them with the mixture. (Alternately you could bake it in a small casserole dish.) Pour boiling water into the roasting pan until it's about an inch deep. Bake for 35-45 minutes, until a knife inserted in the center comes out clean. When cool enough to handle, remove ramekins from the water. Enjoy warm or refrigerate and eat cold. 

    I hope you are enjoying a lovely fall as well! To what does this season inspire you?


This post is part of Real Food Forager's Fat Tuesday, Food Renegade's Fight Back Friday, and The Nourishing Gourmet's Pennywise Platter. 

Thursday, September 22, 2011

Elderberry Syrup

Image from the Bulk Herb Store, where I buy my elderberries.


   As summer fades away thoughts turn toward the upcoming months of cooler weather, cozy mornings, rain, crackling fires... and colds and flu. We're thankful for the good health our family enjoys, and I believe a big part of this comes from eating plenty of nourishing, real food. One of my favorite foods to boost the immune system is the humble elderberry; simmered down into a simple syrup, it becomes a nourishing and delicious tonic. Instead of buying expensive bottles of it at the health food store, it's simple and frugal to make at home, and you can control what sweetener you use, as well as how much you put in. 

    Here's what the Bulk Herb Store, where I've bought dried elderberries, has to say about them: Elderberries are tasty flu fighters. They contain compounds that inhibit the enzyme flu viruses from penetrating our cell membranes and also prevent the virus from invading respiratory tract cells. Taken early enough, as a tea or tincture, you may be able to head off an upcoming illness before it becomes a full-blown flu. They are especially good for bronchitis, colds, coughing, and influenza. Also contains substances that ease inflammation and pain and soothe the intestines, thus making them useful in all inflammatory bowel diseases.

   If you'd like to make this wonderful food for your own family this cold and flu season, here's a simple recipe to get you started. I try to give my kids a spoon full every day through the cooler months; sometimes they take it straight and other times I mix it in with kefir, milk, or put it in a smoothie. If someone seems to be getting sick, they get some several times a day. You can read more about elderberry here. As with anything, please do your own research on any potential risks or benefits. 


Elderberry Syrup

1/2 lb (approx. 2 C.) Dried Elderberries (Sources below)
16 C Pure Water
Spices (Optional - 2 cinnamon sticks, 8 cloves, a chunk of ginger, a few cardamom pods.)
8-12 C. Honey (preferably raw)
2-4 T Clear Alcohol (Everclear or Vodka) (Optional)

In a large stainless steel pot, pour water over dried elderberries. Soak for a couple of hours, until berries have softened. Add optional spices and bring to a boil. (I think the spices make it taste nicer, but don't always use them.) Lower heat and simmer for a couple of hours, until the water is noticeably reduced. It has a very pungent, bitter, almost burnt smell; this is normal! You will notice small "oil slicks" on the top of the water. Take off heat and strain the liquid into a large bowl. Add in an equal amount of honey' this will vary depending on how much you reduced the liquid. It will take a while for the honey to dissolve into the elderberry juice; you can use a stick blender to speed it up if you like. 

Once it's well mixed it should be at room temperature and you can add the optional alcohol. This will act as a preservative and make your syrup last longer. In past years I've not used it, and have found my syrup lasts our family of 6 through the winter season, with enough to share. (Although it molded after that.) This year, I used some elderberry tincture as a preservative to increase the immune boosting properties of this syrup. Whether or not you choose to use alcohol,  you'll need to refrigerate or freeze this; it can only be made shelf stable by adding a LOT more sugar or honey, which I prefer not to do. 

    This recipe makes 4-5 quarts of syrup, plenty for a large family plus some to share. To make a smaller batch, use the basic formula of 2 C Water for every 1/4 C dried berries, then add an equal amount of honey. 

    Dried Elderberries can be purchased from The Bulk Herb Store, Mountain Rose Herbs, or Wilderness Family Naturals. 


This post is part of The Nourishing Gourmet's Pennywise Platter, Food Renegade's Fight Back Friday, and Real Food Forager's Fat Tuesday blog carnivals. 


Thursday, July 21, 2011

Cherries, and Something Yummy


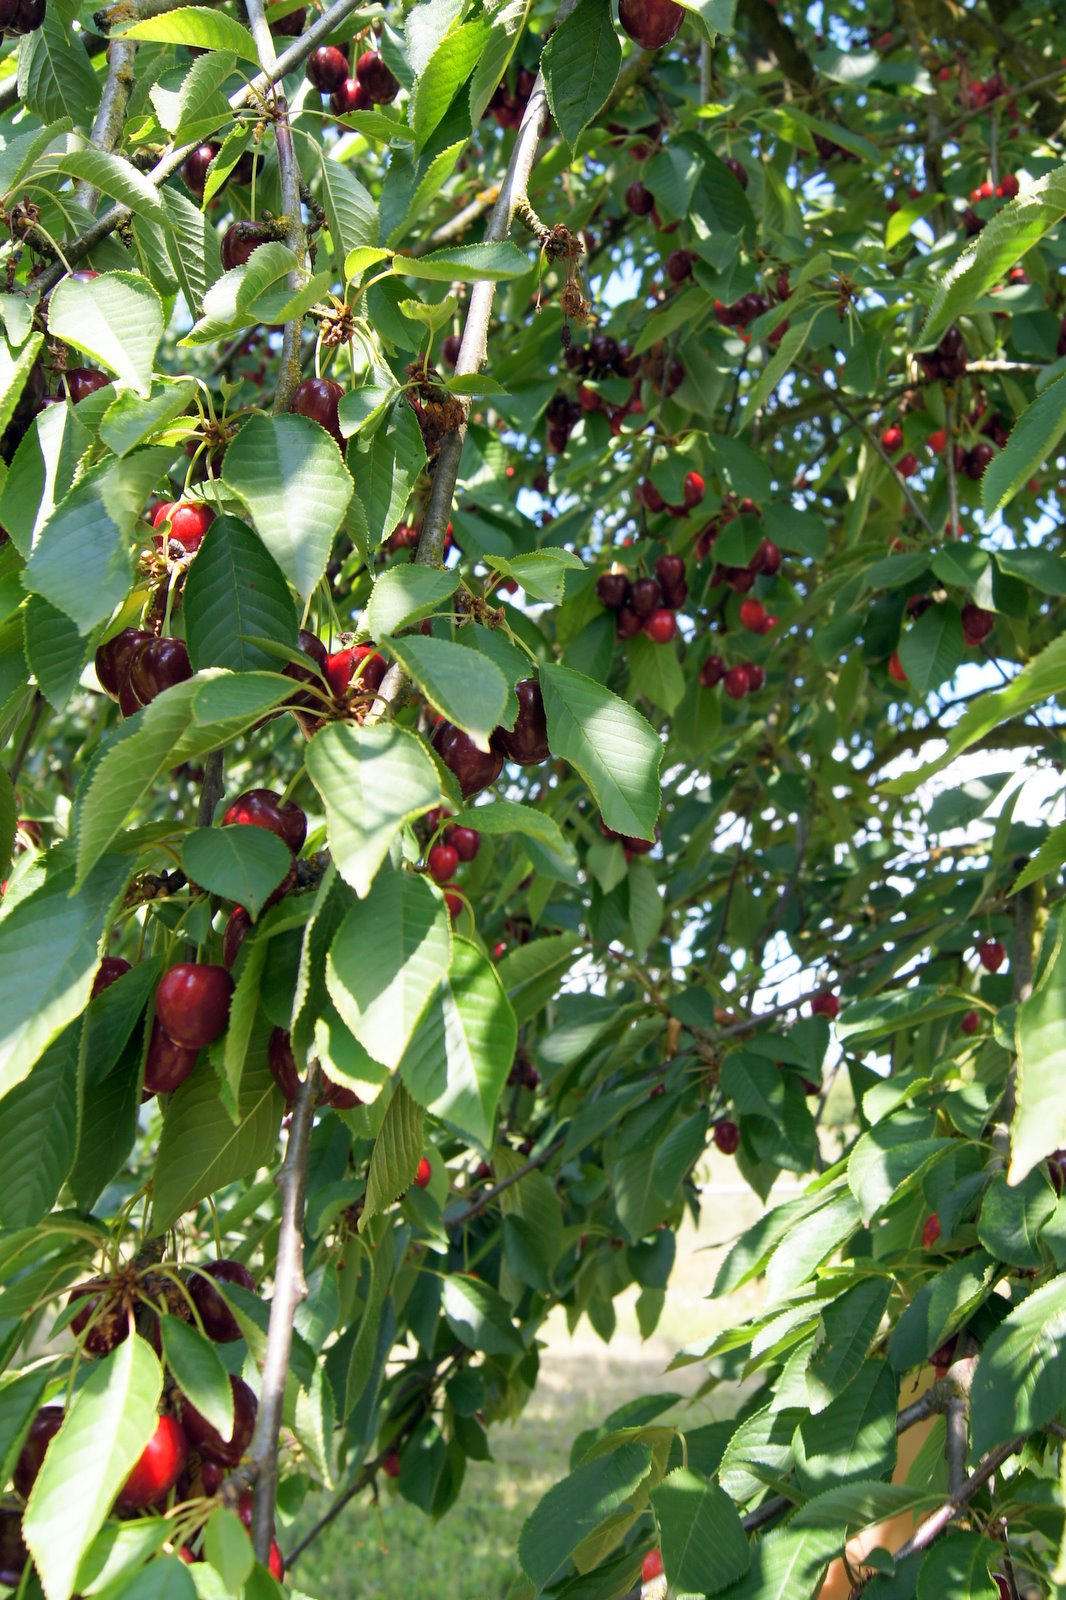
On a perfect summer's day in mid-July, my sister Gloria and I met at a local farm to pick cherries.
A lovely time was had by all!
(Cherry Honey Frozen Yogurt recipe below!)

Luscious fruit hung heavy on the branches.

Some of the best picking was to be found in Auntie Gloria's
basket. At least that's what a couple kids seemed to think! 

There were some strange characters lurking about the farm!

Poppy surprised me by picking more cherries than I did!
She said she didn't eat any because she wanted to save
hers to make Something Yummy. Talk about self-control!

"I will pick mine jerries ever in mine life!" 

Cousin Diego took his cherry eating pretty seriously.

Of course Gloria had to bring a cute basket to pick into!
No ugly plastic buckets for her. 

All picked out!

My beautiful sister. (Well, one of my beautiful sisters!)

Happy mama, happy baby.

In Poppy's words:
"Pearl is astonished by how many cherries are up there!"

Pearl, of course, had to wear the appropriate shoes for the occasion.

Something Yummy #1:
A cherry cream pie, mostly raw.
(Pecan-coconut crust, cashew cream filling, and cherry topping.)

Something Yummy #2:
 Poppy's Cherry Honey Frozen Yogurt


And here's Something Yummy for you!

 Poppy's Cherry Honey Frozen Yogurt
2 C Pitted Fresh Cherries
1/2 C Cream
2 C Yogurt or Kefir
1/4-1/3 C Honey
1 T Vanilla or Almond Extract

Blend all ingredients. You can leave some of the fruit chunky if you like, or puree until smooth. Make sure mixture is cold, and then follow instructions for your ice cream maker.

If you don't have an ice cream maker, don't despair! There are several ways 
you can make this recipe without it. Click here for ideas.
Enjoy!

This post is part of The Nourishing Gourmet's Pennywise Platter
and Food Renegade's Fight Back Friday. 

Wednesday, January 05, 2011

Coconut Haystacks


    I've brought these to a couple potlucks over the last several months and have been asked if I'd share the recipe. My mom used to make chocolate oatmeal no-bake cookies for us when I was a kid, but since my kids can't eat sugar or oats I came up with this version for them. It's gluten free, grain free, refined sugar free, dairy free, no bake, vegan, a one pot wonder, and best of all, just plain yummy. (Even people who can have all those things love these!) They have just a handful of ingredients and come together in as many minutes, which makes them perfect for this busy season of life. Enjoy!

Coconut Haystacks

1/2 C. Peanut Butter
1/2 C. Coconut Oil
1/4 C. Honey
1 t. Vanilla
Sea Salt

2 1/2 C Unsweetened, Shredded Coconut


Chocolate Variation:
Increase honey to 1/3 C. and add 1/2 C. Cocoa powder


Melt the coconut oil in a medium saucepan over low heat. Add the peanut butter, honey, vanilla, and sea salt and stir until well combined. (Resist the temptation to eat this by the spoonful.) Remove from heat and add the shredded coconut; combine. Using a cookie scoop or tablespoon, drop onto a baking sheet that's been greased or is lined with parchment paper. Refrigerate until firm, then remove from the pan and store in an airtight container in the fridge. 


This post is part of The Nourishing Gourmet's Pennywise Platter  Food Renegade's Fight Back Friday, and Real Food Forager's Grain Free Round-up.


Thursday, October 16, 2008

Our Daily Bread-Doh

Poppy's Cinnamon-Raisin Snail


This wasn't the final shaping, but Peregrine was very excited to have spelled MOM with his dough!

For as much as I enjoy being crafty, I've never done a lot of crafts with my kids. I'm just not a fan of spending time and money to make junky things that I then feel guilty about sneaking into the trash at some later date. I feel like a rotten mom just writing that, but there it is... the truth. My kids, however, have no aversion to "junk crafts" and would love it if we'd do more of them. And play dough? Mess, mess, mess. I hate the little pieces that inevitably end up all over the place. I hate the way it gets squished and ground into everything, and I detest the smell of store-bought Play-doh. Not to mention the way it's spelled. (I grew up with a "good mom" who made play dough for us and it didn't stink. I'm sure she hated the mess too, but that didn't stop her.) So, about 80% of the time when my kids ask if we can get Play-doh out I say "No, not today." (Can you believe that The Spell Check Gurus aren't at all bothered by that word, doh? But if I try to spell Playmobil they freak out?)
About once a week we bake bread. It's healthy and hearty and wholesome, and the dough is wonderfully squishy and stretchy and resilient. Most of the time we don't encourage playing with food at the table, but on bread baking day I'm all about it. The kids each get a nice lump of dough to shape and re-shape and stick raisins in to their heart's content. This probably keeps them happy for close to an hour. And when it's done, when they've finally decided on what sort of wonders to make, we put it on a pan, cover it with a towel, and let the little yeasties do their thing. Our wonderful dough doubles in size; when we bake it it doesn't become hard and brittle. Rather, it becomes soft and golden and fragrant. And delicious. Now that's my kind of Play-Dough. 
Here's a recipe for the bread we make. It's Whole Wheat but you'd never guess it. It's so soft and light and still tastes great several days after it's been baked. This recipe makes two loaves, or one loaf and all sorts of smaller wonders. The original recipe is here, and this is scaled down and slightly modified, the way we make it. I usually use freshly ground hard white wheat berries or whole wheat pastry flour, but you could use regular whole wheat. 

Whole Wheat Bread

1 1/2 T Yeast
2 C Warm Water
2 C Whole Wheat Flour 
Mix together in a bowl and let sit until double- about 20-30 minutes.

Add:
1/4 C Oil
1/3 C Honey
1 1/2 t. Salt
1/4 C. Gluten Flour
1/4-1/2 C. Ground Flax Seed (optional)
3 C Whole Wheat Flour
If using a mixer knead with a dough hook. If the dough is too sticky after about two or three minutes then add little more flour until it's the right consistency. Knead for a few more minutes until dough is smooth and stretchy. If kneading by hand, go to the original recipe and follow her directions. Place in an oiled bowl and cover with a damp cloth. Let rise until the dough has doubled, about an hour. Punch down and shape into loaves (or snails, whales, snakes, cinnamon rolls, cars, birds, etc.) Let rise another 30 minutes. Bake at 350 degrees for 25-30 minutes for a large loaf or less for smaller shapes. Enjoy!


Friday, August 22, 2008

Pit-Goo


I've always enjoyed tinkering with making my own "stuff". I've played around with lotions and potions of various kinds. One thing I'd never even thought about though, was deodorant. Yes, I cringed every time I reached for a stick of natural, aluminum-free deodorant, but I just figured that was the (high) price I had to pay not to stink. For a while I used the crystal mineral spray and that worked pretty well until I had Raphael. After that my hormones changed or something and it just wasn't doing the trick. So I did a little research and tried this recipe. I found it online somewhere, and would give credit where credit is due but I couldn't find it again when I tried. I used this one because I had all of the ingredients in the house and it's very, very simple.

Mix together:
1 T Extra Virgin Olive Oil
1 T Baking Soda
1 T Corn Starch
6 Drops each Tea Tree and Lavender Essential Oils
Store in a jar and apply with a fingertip.

Surprisingly, this works very well. I've been wanting to post about it for a while, but thought I should give it enough time to be sure it still worked. I'm happy to say that I've been using it for several weeks and it really has done the trick, even when our temperatures were in the high 90s. Erik and one of my good friends have also been using it and have found it effective.
When it came time for me to make a second batch I added some cocoa butter to make it a little more of a creamy consistency and not so soup-y. (Or goopy. Erik likes to refer to this as "Pit-Goo". He has a real way with words.) Here is Pit-Goo, version two. It's a bigger batch, but you could make a smaller amount to see if it works for you.

In a small saucepan over low heat melt:
1oz Cocoa Butter

Remove from heat and add:
1/4 C Extra Virgin Olive Oil
1/4 C Baking Soda
1/4 C Corn Starch
20 Drops each Tea Tree and Lavender Essential Oil

Let the mixture cool in the saucepan and stir it occasionally so the baking soda and cornstarch are suspended as it cools. Spoon into a jar or small container and apply with a fingertip. 

I'm very happy to say that both of these recipes have worked very well for us. They are both simple and inexpensive. And I don't know about you, but it makes me feel good to be able to make something that I always thought I had to be dependent on someone else for! Or, as Deb said in her post about making laundry detergent, it's nice to "get off the grid". 
If you decide to try it, let me know. And I hope you all have a great weekend! 

Friday, May 23, 2008

Mmm...muffins

*Quick update: I'm feeling much better; thanks so much for your prayers! 

I've always loved muffins, and this is a recipe I've been playing with for a while. My sister Alyssa keeps asking for it so I thought I'd just share it here. These muffins are not only yummy, but are also full of lots of things you're body will like. They're high in fiber and whole grains, low in fat, not too sweet, and yet are very moist and flavorful. This recipe makes 24 regular sized muffins. Here goes....

1 1/2 C Flour (I use whole wheat pastry flour)
1 C Ground Flax Seed
3/4 C Oat Bran
3/4 C Brown Sugar (or Sucanat)
2 t baking soda
1 t baking powder
1 t salt
2 t cinnamon
1 C raisins, dried cranberries, or other dried fruit
1 C chopped nuts or seeds (I like toasted pecans)
~~~~~~~~~~~~~~~~~~~~~~~~~~~~~~~~~~~~~
1/3 C milk (kefir works great if you have it)
3 eggs
1 t vanilla
1/2 C milk powder (optional)
1 orange, unpeeled and cut into large chunks.
1/4 C oil
~~~~~~~~~~~~~~~~~~~~~~~~~~~~~~~~~~~~~
1 1/2 C shredded carrots (you could substitute zucchini when it's in season)
2 apples, shredded

Preheat oven to 350 degrees. 
Mix first group of ingredients together in a large bowl. Put milk, eggs, vanilla, milk powder if using, orange chunks, and oil into a blender or food processor. Blend until the orange is pureed. You'll still see bits of peel in there as if you had grated the rind. Dump this into a separate mixing bowl and mix in the shredded carrots and apples. (I shred these in my food processor/blender. This may be my favorite kitchen appliance, by the way! Useful for so many things.)
Mix the wet ingredients into the dry with a whisk or wooden spoon; the batter will be thick. Spoon into muffin pans. (I use paper liners, but if you don't you'll need to grease the pan first.) You can fill them right up to the top; they don't rise a whole lot. Bake for 15 to 20 minutes, or until a toothpick comes out clean. Because they are so moist they're good even a couple of days after being baked, but I would refrigerate them if you're going to keep them around more than a day. 
If you make them let me know what you think! 
Hope you all have a good weekend! 


Saturday, February 24, 2007

Chocolate Cherry Cake

Peregrine likes baking too!


I have many happy memories of baking with my mom as a little girl. Since getting married I've enjoyed creating baked goods for my own family. My husband has a sensitivity to wheat, so I've had to learn to use alternate flours when baking for him. The following Chocolate Cherry Cake recipe is a blend of my mom's Dark Chocolate Cake and the Cherry Chocolate Cake Erik's mom always made for his birthdays. (And that won him a ribbon in a county fair when he was ten!) I had fun combining the two recipes and making this decadent, yet simple, gluten free chocolate cake for him. You can, of course, make it with regular flour and it's just as good!


Chocolate Cherry Cake

2 cups all purpose Flour (or 1 Cup Rice Flour, 1/2 cup Tapioca Flour and 1/2 Cup Potato Starch)
1 cup cocoa powder
2 teaspoons baking soda
1 teaspoon baking powder
1/2 teaspoon salt
1/2 cup melted butter or coconut oil
1 1/2 cups sugar
2 eggs
3/4 cup buttermilk or sour milk
3/4 cup strong coffee
1 teaspoon almond extract
1 can (21oz) cherry pie filling, 1/4 cup reserved
1 package (8oz) cream cheese
1/2 teaspoon vanilla
12 oz chocolate chips
1 C whipping cream

CAKE
1. Heat oven to 350F. Grease and lightly flour two 9 x 1 1/2-inch round pans; set pans aside. Allow cream cheese to soften at room temperature while you prepare the batter.
2. Sift flour, cocoa, baking soda, baking powder, and salt into a medium bowl.
3. In a large mixing bowl combine oil, sugar, eggs, buttermilk, coffee, and almond extract. Beat with an electric mixer on medium speed until well combined, about two minutes.
4. Reserve 1/4 cup cherry pie filling. Mix remaining pie filling into wet ingredients. Add dry mixture and beat on low speed until just combined. Divide batter into prepared pans.
5. Bake at 350F for 30-35 minutes or until a wooden toothpick comes out clean. Prepare filling. Cool cakes on wire racks for 10 minutes before turning out of pans. Cool thoroughly on racks.

FILLING
1. In a small bowl mix reserved 1/4 cup pie filling, cream cheese, and vanilla.

GANACHE FROSTING
1. Heat cream in a saucepan until it begins to simmer. Remove from heat.
2. Pour chocolate chips into the cream and let stand five minutes.
3. Stir until cream and chocolate are thoroughly mixed and smooth.

To assemble cakes spread filling in between the layers and frost top and sides with Ganache. The above photo is a slight variation on the usual layers I do with this cake!
16 Servings